Preparing Your Lancing Device:
1. Remove the lancing device cap
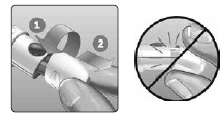
- Remove the cap by rotating it and then pulling it straight off the device.
2. Insert a sterile lancet into the lancing device
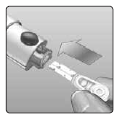
- Align the lancet as shown here, so that the lancet fits into the lancet holder.
- Push the lancet into the device until it snaps into place and is fully seated in the holder.

- Twist the protective cover one full turn until it separates from the lancet. Save the protective cover for lancet removal and disposal.
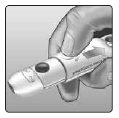
3. Replace the lancing device cap

- Place the cap back onto the device; turn the cap or push the cap straight on to secure it.
- Ensure the cap is aligned as shown in the image.
4. Adjust the depth setting

- The device has 13 puncture depth settings (each dot shown between numbers 1 to 7 on the Depth Wheel indicates an additional available depth setting).
- Adjust the depth by turning the depth wheel. Smaller numbers are for a shallower puncture and larger numbers for a deeper puncture.
5. Cock the lancing device
- Pull the slider back until it clicks. If it does not click, it may already have been cocked when you inserted the lancet.

