Testing with a fingertip sample:
- Before testing, wash your hands thoroughly with warm, soapy water. Rinse and dry.
1. Snap off the lancing device cap
2. Insert a sterile lancet

-
-
- Firmly push the lancet into the holder.
- NOTE: For alternate site testing, use only OneTouch® UltraSoft® Lancets.
3. Twist off the protective cover and save it for later use
-
-
- Replace the blue cap by snapping it back on.
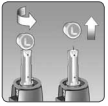
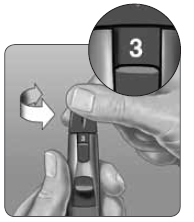
4. Adjust the depth setting
-
-
- Twist the lancing device cap until the desired setting appears. Smaller numbers are for shallower punctures, which may be less painful.
- Shallower punctures work for children and most adults. Deeper punctures work well for people with thick or callused skin.
5. Cock the lancing device
-
-
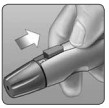
- Slide the cocking control back until it clicks.
- If it does not click, that’s okay. It may have been cocked when you inserted the lancet.
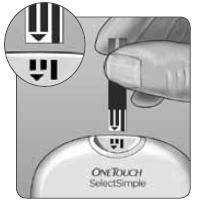
6. Insert a test strip to turn the meter on
-
-
- Insert a test strip into the test strip port as shown, with the contact bars facing you and the arrow pointing down.
-
-
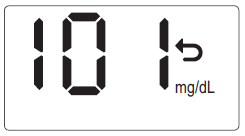
- After the start-up test screen, your last result (blood glucose or control solution test) will appear on the display, and the back arrow icon will blink.
-
-
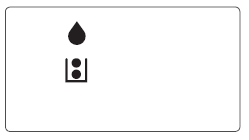
- After your last result is displayed, your meter will beep and an icon appears showing a drop with a test strip that fills. This indicates that your meter is ready for you to apply a blood sample. You have 2 minutes to apply a blood sample before the meter turns off.
7. Lance your finger
-
-
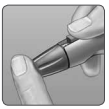
- Hold the lancing device firmly against the side of your finger. Press the release button.
8. Get a round drop of blood

-
-
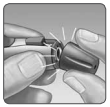
- Gently squeeze your finger until you get a round drop of blood.
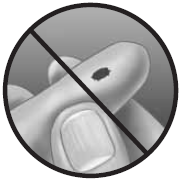
-
-
- If the blood smears or runs, do not use that sample. Wipe the area and gently squeeze another drop of blood or puncture a new site.

